
chapter_1.md 6.1 KB
Chapter 1 : Hello Rust
About this tutorial
This tutorial is free and open source, and all code uses the MIT license - so you are free to do with it as you like. My hope is that you will enjoy the tutorial, and make great games!
If you enjoy this and would like me to keep writing, please consider supporting my Patreon.
This tutorial will get you started with Rust development, and RLTK - The RogueLike Took Kit - we'll be using to provide console output.
Getting Rust
On most platforms, rustup is enough to get you a working Rust toolchain. On Windows, it's an easy download - and you get a working Rust environment when it is done. On Unix-derived systems (such as Linux, and OS X) it provides some command-line instructions to install the environment.
Once it is installed, verify that it is working by typing cargo --version on your command line. You should see something like cargo 1.36.0 (c4fcfb725 2019-05-15) (the version will change over time).
Getting comfortable with a development environment
You want to make a directory/folder for your development work. You'll also want a text editor. I'm a fan of Visual Studio Code, but you can use whatever you are comfortable with. If you do use Visual Studio Code, I recommend the following extensions:
Better TOML: makes reading toml files nice; Rust uses them a lotC/C++: uses the C++ debugger system to debug Rust codeRust (rls): not the fastest, but thorough syntax highlighting and error checking as you go.
Once you've picked your environment, open up an editor and navigate to your new folder (in VS Code, File -> Open Folder and choose the folder).
Creating a project
Now that you are in your chosen folder, you want to open a terminal/console window there. In VS Code, this is Terminal -> New Terminal. Otherwise, open a command line as normal and cd to your folder.
Rust has a built-in package manager called cargo. Cargo can make project templates for you! So to create your new project, type cargo init hellorust. After a moment, a new folder has appeared in your project - titled hellorust.
It will contain the following files and directories:
src\main.rs
Cargo.toml
.gitignore
These are:
- The
.gitignoreis handy if you are using git - it stops you from accidentally putting files into the git repository that don't need to be there. If you aren't using git, you can ignore it. src\main.rsis a simple Rust "hello world" program source.Cargo.tomldefines your project, and how it should be built.
Go ahead and type cargo run. After some compilation, if everything is working you will be greeted with "Hello World" on your terminal.
Setup Cargo.toml
The auto-generated Cargo file will look like this:
[package]
name = "helloworld"
version = "0.1.0"
authors = ["Your name if it knows it"]
edition = "2018"

# See more keys and their definitions at https://doc.rust-lang.org/cargo/reference/manifest.html

[dependencies]
Go ahead and make sure that your name is correct! Next, we're going to ask Cargo to use RLTK - the Roguelike toolkit library. Rust makes this very easy. Adjust the dependencies section to look like this:
[dependencies]
rltk = { git = "https://github.com/thebracket/rltk_rs" }
We're telling it that the package is named rltk and giving it a Github location to pull from.
Hello Rust - RLTK Style!
Go ahead and replace the contents of src\main.rs with:
extern crate rltk;
use rltk::{Rltk, GameState, Console};

struct State {}
impl GameState for State {
    fn tick(&mut self, ctx : &mut Rltk) {
        ctx.cls();
        ctx.print(1, 1, "Hello Rust World");
    }
}

fn main() {
    let context = Rltk::init_simple8x8(80, 50, "Hello Rust World", "resources");
    let gs = State{ };
    rltk::main_loop(context, gs);
}
Now create a new folder called resources. RLTK needs a few files to run, and this is where we put them. Download resources.zip, and unzip it into this folder. Be careful to have resources/backing.fs (etc.) and not resources/resources/backing.fs.
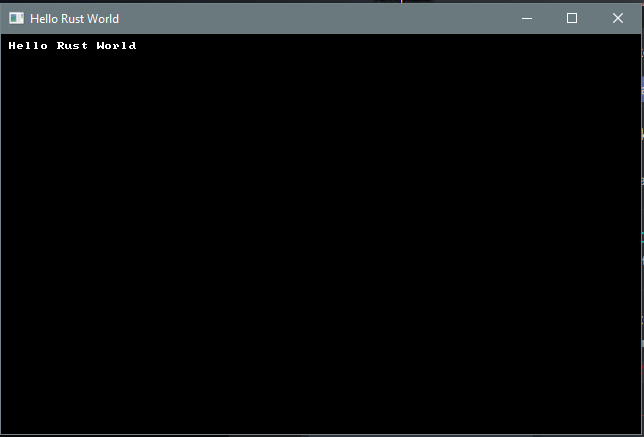
Save, and go back to the terminal. Type cargo run, and you will be greeted with a console window showing Hello Rust.
Playing with the tutorials
You'd probably like to play with the tutorial code without having to type it all in! The good news is that it is up on GitHub for your perusal. You need to have git installed (RustUp should have helped you with that). Choose where you would like to have the tutorials, and open a terminal:
cd <path to tutorials>
git clone https://github.com/thebracket/rustrogueliketutorial .
After a while, this will download the complete tutorial (including the source code for this book!). It is laid out as follows (this isn't complete!):
───book
├───chapter-01-hellorust
├───chapter-02-helloecs
├───chapter-03-walkmap
├───chapter-04-newmap
├───chapter-05-fov
├───resources
├───src
What's here?
- The
bookfolder contains the source code for this book. You can ignore it, unless you feel like correcting my spelling! - Each chapter's example code is contained in
chapter-xy-namefolders; for example,chapter-01-hellorust. - The
srcfolder contains a simple script to remind you to change to a chapter folder before running anything. resourceshas the contents of the ZIP file you downloaded for this example. All the chapter folders are preconfigured to use this.Cargo.tomlis setup to include all of the tutorials as "workspace entries" - they share dependencies, so it won't eat your whole drive re-downloading everything each time you use it.
To run an example, open your terminal and:
cd <where you put the tutorials>
cd chapter-01-hellorust
cargo run
If you are using Visual Studio Code, you can instead use File -> Open Folder to open the whole directory that you checked out. Using the inbuilt terminal, you can simply cd to each example and cargo run it.
Copyright (C) 2019, Herbert Wolverson.